Create a pool
A pool represents a Kubernetes cluster where AI Gateway will be deployed. Pools define cluster-specific configurations like namespace, resource limits, ingress settings, and more.
Prerequisites
- Access to the Cequence AI Gateway UI with Tenant Admin or Tenant User role
- Basic understanding of Kubernetes concepts (namespaces, ingress, resources)
UI Overview: Private Pools Page
The Private Pools page (under Deployment Pools → Private Pools in the sidebar) is your central hub for managing pools.
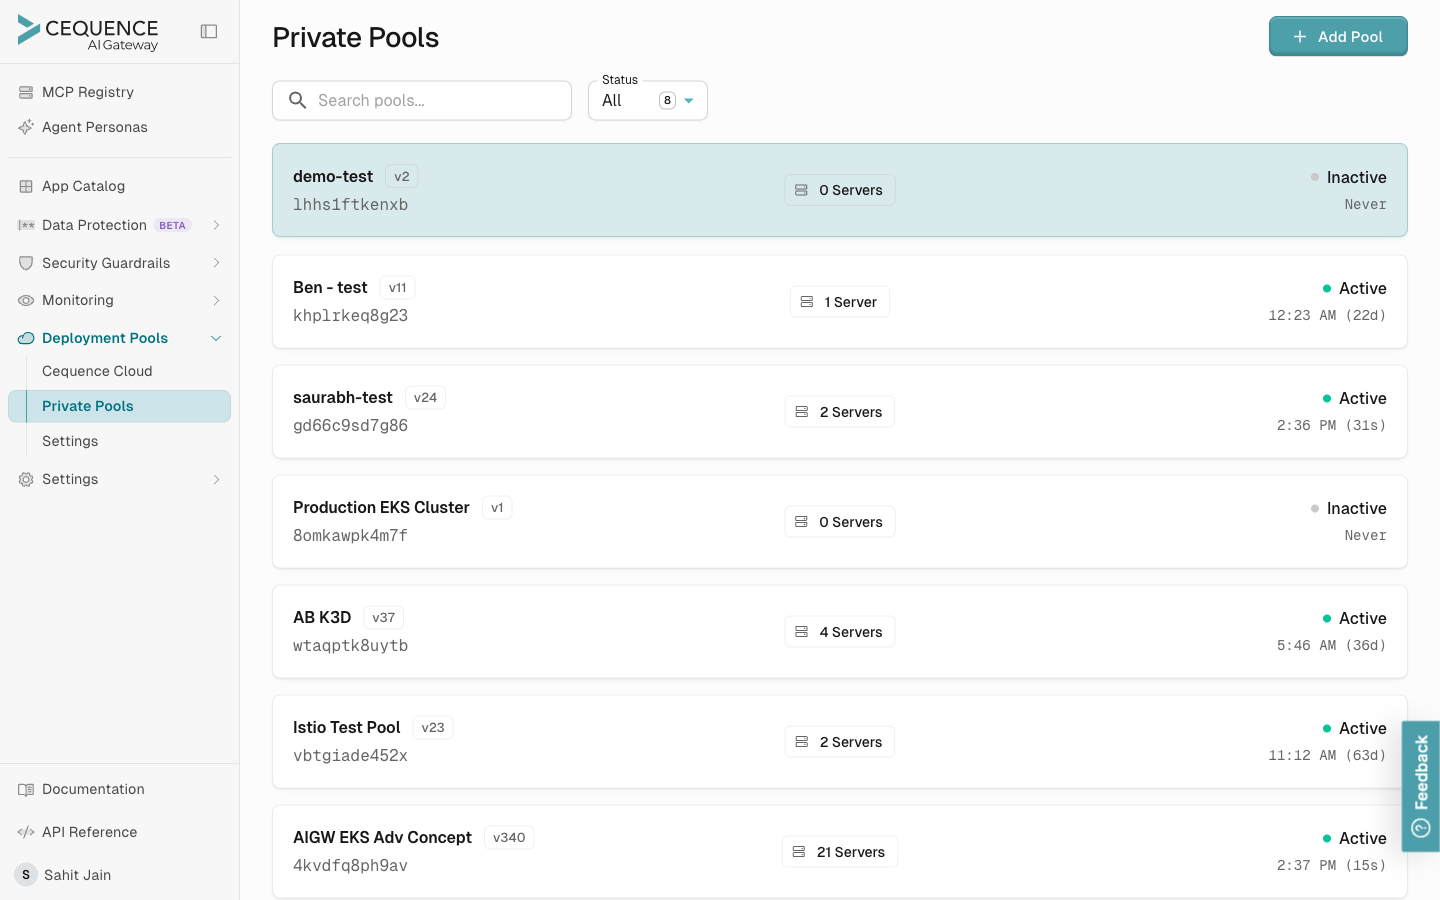
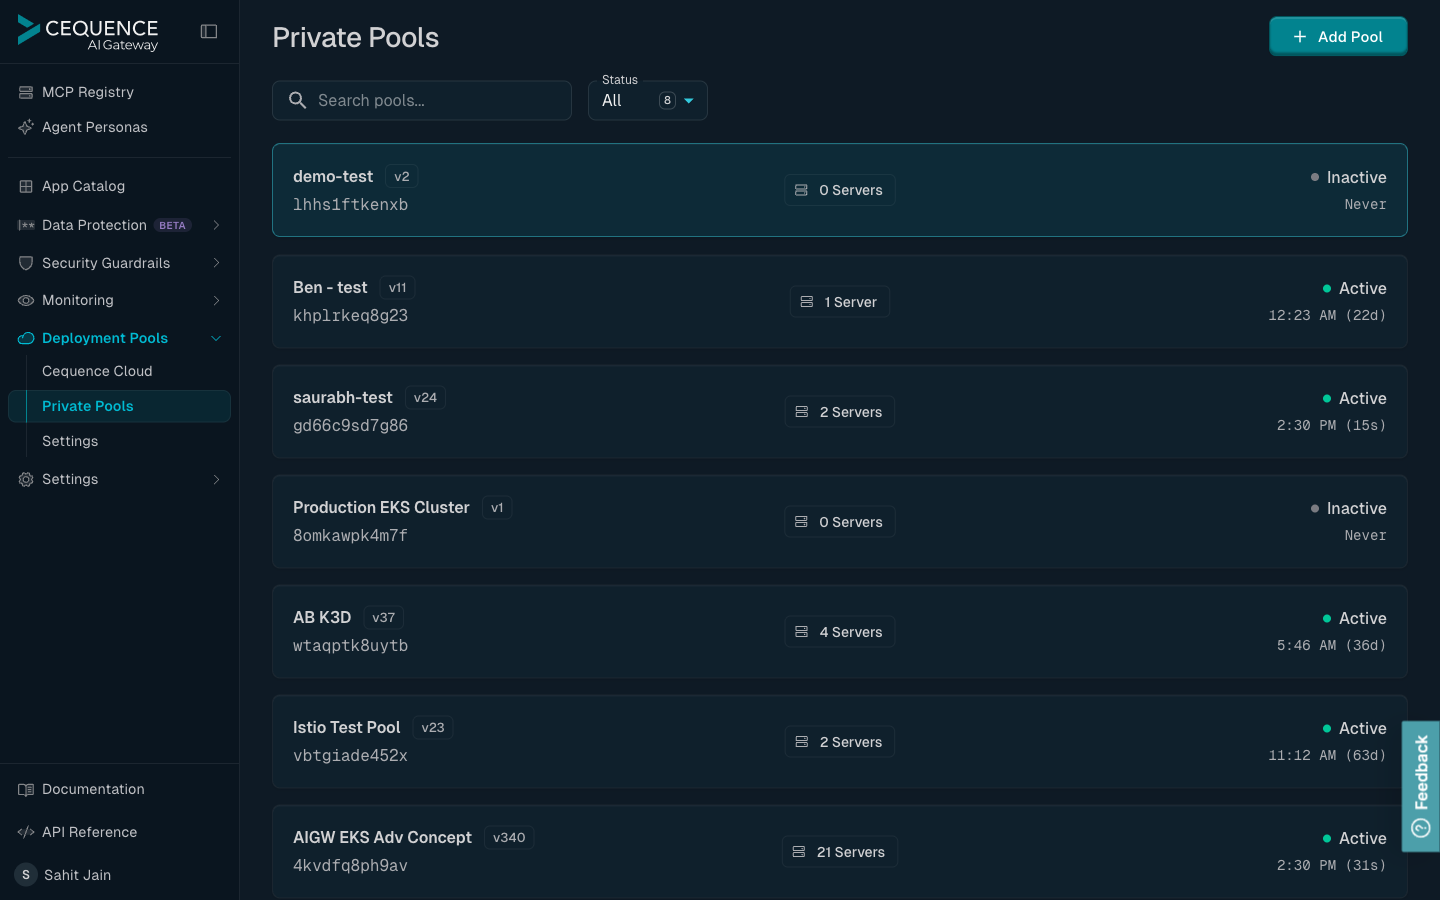
You'll see one of two states depending on whether the tenant has any pools:
Empty state (no pools created yet):
- Centered message: "No pools found"
- Instructional text: "Create your first pool to deploy MCP servers"
- An "Add Pool" button with a plus icon in the centre, mirrored by another in the top-right of the page
Pools list view (after creating pools, shown above):
- Header: search box, Status filter (All / Active / Inactive), and the Add Pool button
- Pool tiles: each tile shows the pool name, pool ID, current status, and a quick summary of deployed servers. Click a tile to open the pool detail page (see Pool detail page below).
Step-by-Step: Creating a Pool
The Create New Pool dialog only collects the essentials needed to bootstrap a pool. Ingress, endpoints, SIEM, and similar settings are configured on the pool detail page after creation — see Pool detail page.
-
Navigate to Private Pools
- Log in to the Cequence AI Gateway UI
- Expand Deployment Pools in the left sidebar and select Private Pools
-
Open the Create New Pool dialog
- Select the Add Pool button (top-right of the page, or the centred button if your pool list is empty)
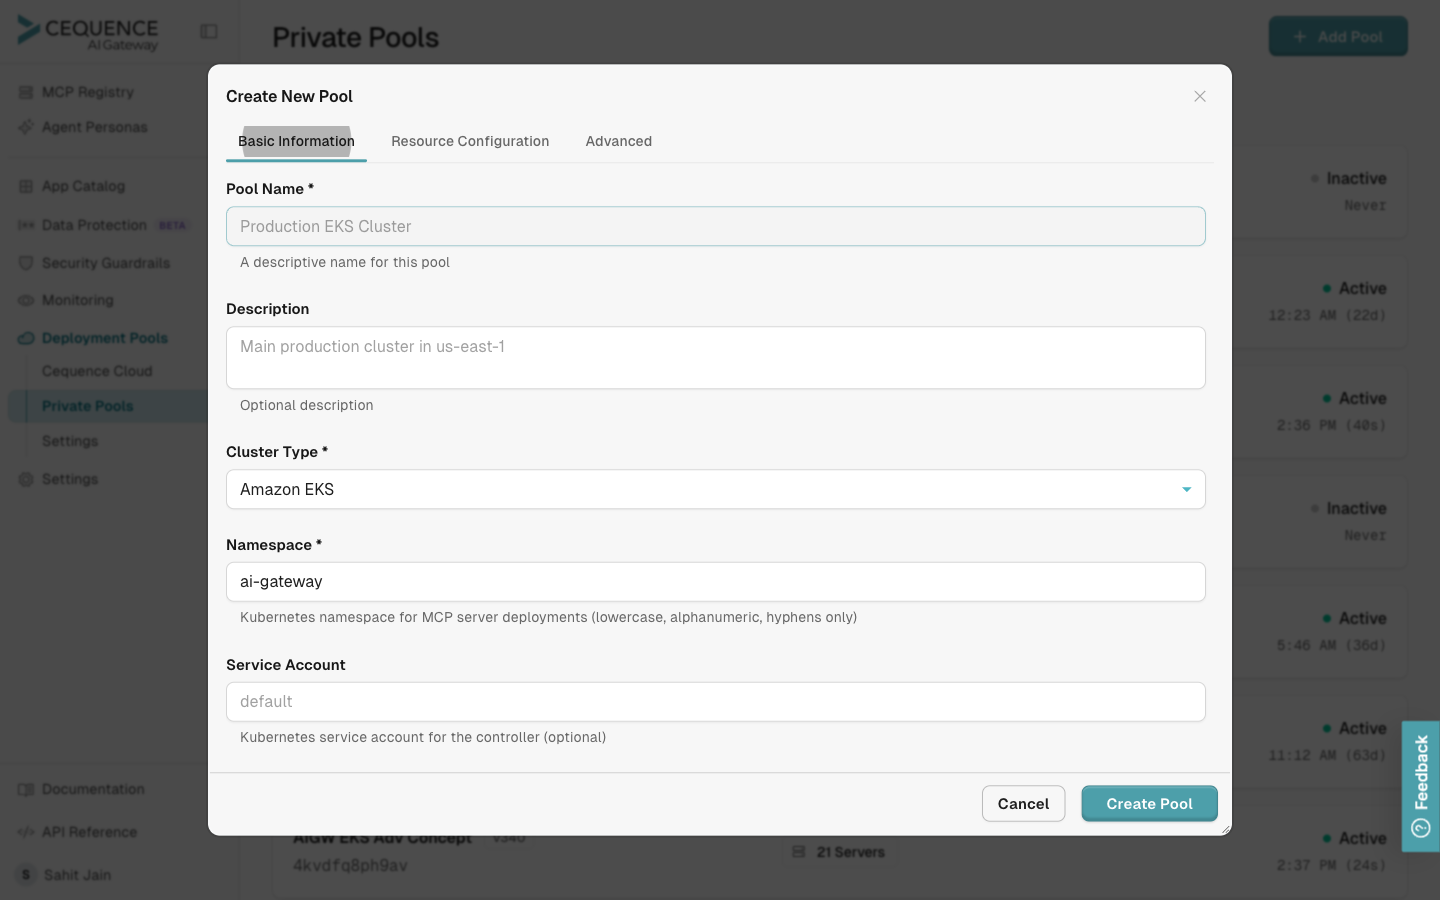
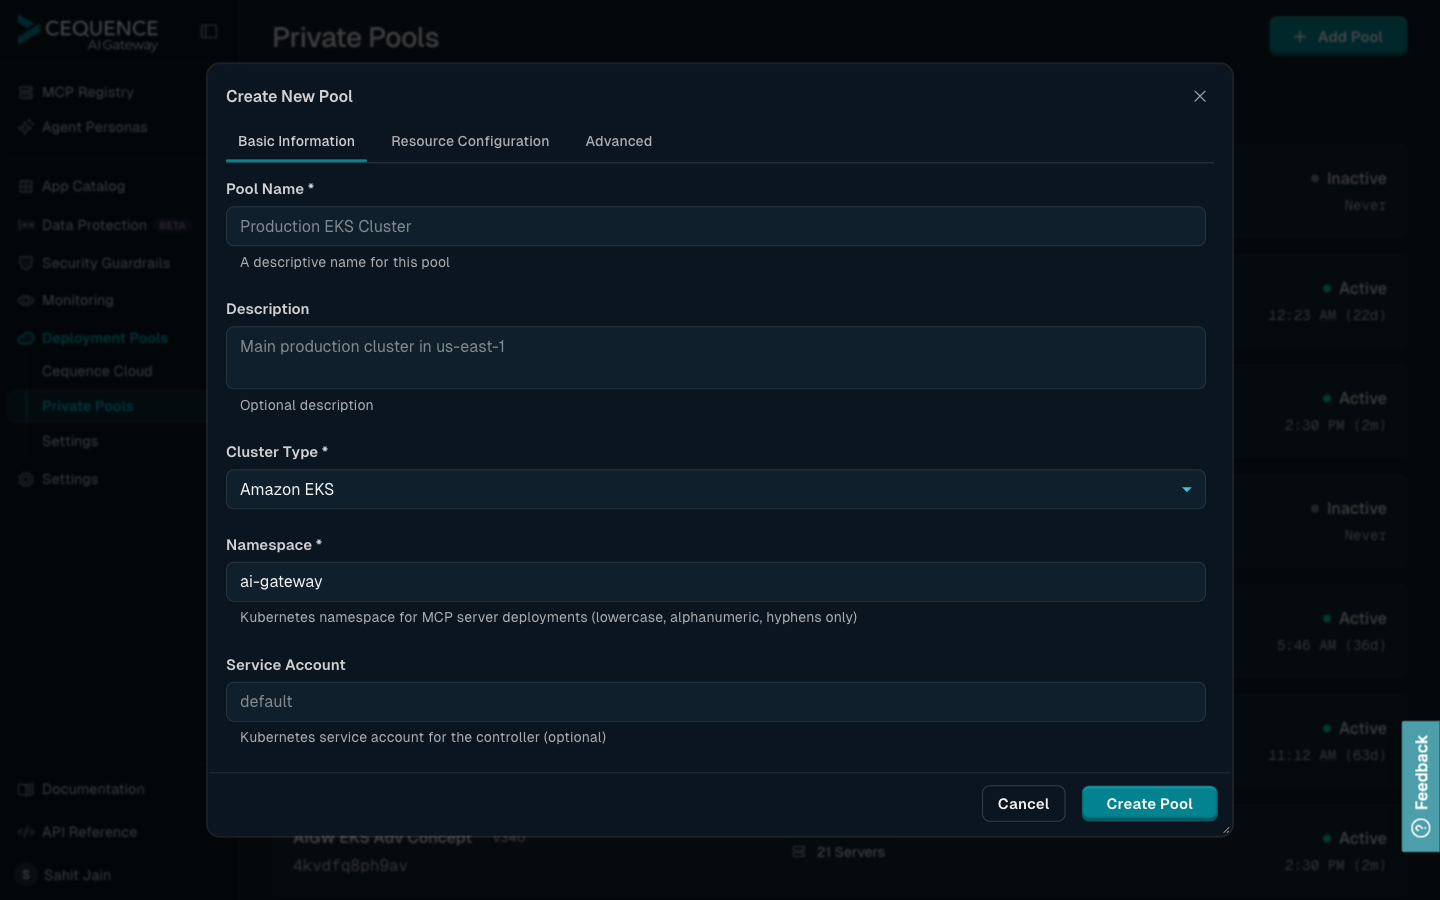
- The "Create New Pool" dialog opens with three tabs:
- Basic Information (selected by default)
- Resource Configuration
- Advanced
-
Configure Basic Information (Tab 1)
The "Basic Information" tab is selected by default when the dialog opens. Fill in the following fields:
UI reference: the Basic Information tab shows:
- Pool Name field (required) with helper text "A descriptive name for this pool"
- Description multi-line text area (optional) with helper text "Optional description"
- Cluster Type dropdown (required) with options: Amazon EKS, Azure AKS, Google GKE, Native Kubernetes
- Namespace field (required) with helper text "Kubernetes namespace for MCP server deployments (lowercase, alphanumeric, hyphens only)"
- Service Account field (optional) with helper text "Kubernetes service account for the controller (optional)" — set this to use a pool-provided ServiceAccount instead of having the CLI create one
Fill in the following required fields:
-
Pool Name (Required)
- Enter a descriptive name (for example, "Production EKS Cluster", "Dev GKE Cluster")
- Example:
production-eks-us-west-2
-
Description (Optional)
- Add a description for this pool
- Example:
Production cluster for US West region workloads
-
Cluster Type (Required)
- Select your Kubernetes cluster type from the dropdown:
- Amazon EKS - Amazon Elastic Kubernetes Service
- Azure AKS - Azure Kubernetes Service
- Google GKE - Google Kubernetes Engine
- Native Kubernetes - Standard Kubernetes cluster
- Select your Kubernetes cluster type from the dropdown:
-
Namespace (Required)
- Enter the Kubernetes namespace where MCP servers are deployed
- Default:
ai-gateway - Must be lowercase, alphanumeric, and hyphens only (max 63 characters)
- Example:
ai-gatewayormcp-servers
-
Service Account (Optional)
- Specify a Kubernetes service account for the Operator
- Leave empty to use the default service account
- Example:
aigateway-operator-sa
-
Configure Resource Configuration (Tab 2)
Set default resource limits for MCP server deployments:
-
Resource Requests
- CPU Requests: Minimum CPU allocation (for example,
100m,0.5,1)- Format: Numbers with optional 'm' suffix (millicores)
- Example:
100m(0.1 CPU cores)
- Memory Requests: Minimum memory allocation (for example,
128Mi,256Mi,1Gi)- Format: Numbers with unit suffix (Mi, Gi, M, G, Ki, K)
- Example:
128Mi(128 mebibytes)
- CPU Requests: Minimum CPU allocation (for example,
-
Resource Limits
- CPU Limits: Maximum CPU allocation (for example,
500m,1,2)- Example:
500m(0.5 CPU cores)
- Example:
- Memory Limits: Maximum memory allocation (for example,
512Mi,1Gi,2Gi)- Example:
512Mi(512 mebibytes)
- Example:
- CPU Limits: Maximum CPU allocation (for example,
-
Scaling Configuration
- Max Replicas: Maximum number of replicas per MCP deployment
- Range: 1-50
- Default:
5 - Example:
10for high-availability deployments
- Max Replicas: Maximum number of replicas per MCP deployment
Note: These are default values applied to all MCP servers deployed in this pool. Individual MCP servers can override these settings from the Edit Pool dialog under the "Resource Configuration" tab, which shows per-MCP resource overrides.
-
-
Configure Advanced Settings (Tab 3)
-
Redis Configuration
Production recommendation: bring your own enterprise-grade Redis (Amazon ElastiCache, Azure Cache for Redis, Google Memorystore, Redis Enterprise, or your platform team's managed HA Redis). Select Manual mode and provide its connection details. The bundled Auto-install Redis is HA-capable (3-node Sentinel), but production deployments should use external managed Redis for backup/restore tooling, observability, blast-radius isolation, and your standard cache operations.
Choose between two modes:
-
Manual (Recommended for production — bring your own enterprise Redis)
- Point AI Gateway at an existing Redis you already operate — Amazon ElastiCache, Azure Cache for Redis, Google Memorystore, Redis Enterprise, or your platform team's HA Redis fleet.
- Provide your own Redis connection details:
- Host: Redis server hostname or IP
- Example:
my-cache.abc123.use1.cache.amazonaws.comorredis.internal.company.com
- Example:
- Port: Redis server port
- Default:
6379
- Default:
- Username (Optional): Redis authentication username
- Password: Redis authentication password
- Database: Redis database number
- Default:
0
- Default:
- Enable TLS/SSL: Toggle TLS encryption for Redis connection
- Host: Redis server hostname or IP
-
Auto-install (Dev, POV, and self-contained installs)
- The Operator deploys a 3-node Redis Sentinel StatefulSet (1 master + 2 replicas with Sentinel sidecars) in the pool namespace, with persistent volumes, a PodDisruptionBudget, and an HPA. The topology is HA — failover is handled by Sentinel — but backup/restore, point-in-time recovery, cross-region replication, and cache-specific monitoring are not provided.
- Use for first-time setup, POVs, dev/test clusters, or installs that must be fully self-contained.
- For production, prefer Manual so that Redis is operated by your existing cache infrastructure and sits outside the pool's blast radius.
-
-
Image Configuration (Pool-level settings)
Configure custom container images for this pool. Leave any field empty to use the system default for that component. The most common use is pointing the pool at images you've mirrored into your internal registry.
- Operator Image: Container image path with tag for the Operator
- Format:
registry/repository/image:tag - Example:
your-registry.example.com/ai-gateway/operator:v10
- Format:
- Armor Image: Container image path with tag for the Armor data plane gateway
- Example:
your-registry.example.com/ai-gateway/armor:v12
- Example:
- Controller Image (Optional): Container image for the in-cluster controller component
- MCP Server Image (Optional): Default container image used when deploying MCP servers to this pool
- SIEM Manager Image (Optional): Container image for the SIEM log exporter
- Registry Credentials Secret Name: Name of the Kubernetes
dockerconfigjsonSecret in the pool's namespace that holds pull credentials for your registry. The Secret must already exist in the cluster before you runaigateway deploy install— the CLI references it by name but does not create it. See Create a pull secret for how to provision it.- Example:
regcred
- Example:
Note: These settings are stored at the pool level. Each pool can have different image configurations. If left empty, the system defaults are used. Override these only if you need to pull from a private registry or pin a specific version.
To pull every image from your own registry, see Mirror the images.
- Operator Image: Container image path with tag for the Operator
-
Pool Annotations (Optional)
Add custom Kubernetes annotations applied to all MCP deployments in this pool:
- Common annotations:
app.kubernetes.io/managed-by: ai-gateway-operatorenvironment: productionteam: platform
- Select Add to add each annotation key-value pair
- Common annotations:
-
-
Create the Pool
- Review all configurations across all tabs
- Select Create Pool button
- The pool is created and appears in your Private Cloud pools list
UI Reference: After creating a pool, you'll be returned to the Private Cloud page where your new pool appears in the list. The pool entry shows:
- Pool name and version (for example,
your-pool-name v1) - Unique pool ID (short identifier like "abc123xyz")
- Number of servers deployed (initially 0)
- Status (Active/Inactive)
- Last active timestamp (shows "Never" for newly created pools)
You can filter pools by status using the Status dropdown at the top of the page.
Pool Configuration Summary
Here's a complete example configuration:
Basic Information:
- Name:
production-eks-us-west-2 - Description:
Production cluster for US West region workloads - Cluster Type:
Amazon EKS - Namespace:
ai-gateway - Service Account:
aigateway-operator-sa(optional)
Resource Configuration:
- CPU Requests:
100m - Memory Requests:
128Mi - CPU Limits:
500m - Memory Limits:
512Mi - Max Replicas:
5
Advanced Configuration:
- Redis Mode:
Manual(production — point at your enterprise/managed Redis) orAuto-install(in-cluster Sentinel HA, for dev/POV/self-contained installs) - Operator Image: Leave empty for default (or set your mirrored registry path)
- Armor Image: Leave empty for default (or set your mirrored registry path)
- SIEM Manager Image: Leave empty for default (optional)
Pool detail page
After you create a pool you're taken to its detail page at /private-cloud/<pool-id>. This is where the rest of pool configuration lives — ingress, endpoints, SIEM, and per-component settings — and where you'll come back to manage the pool over time.
Pool Configuration Pending banner
A freshly created pool starts in a pending state until the Operator has been deployed to the cluster. The page shows a Pool Configuration Pending banner with a one-line aigateway init command pre-filled with your tenant ID, pool ID, and namespace. Click Copy Command, paste it into your terminal, and continue with the install in Install the CLI.
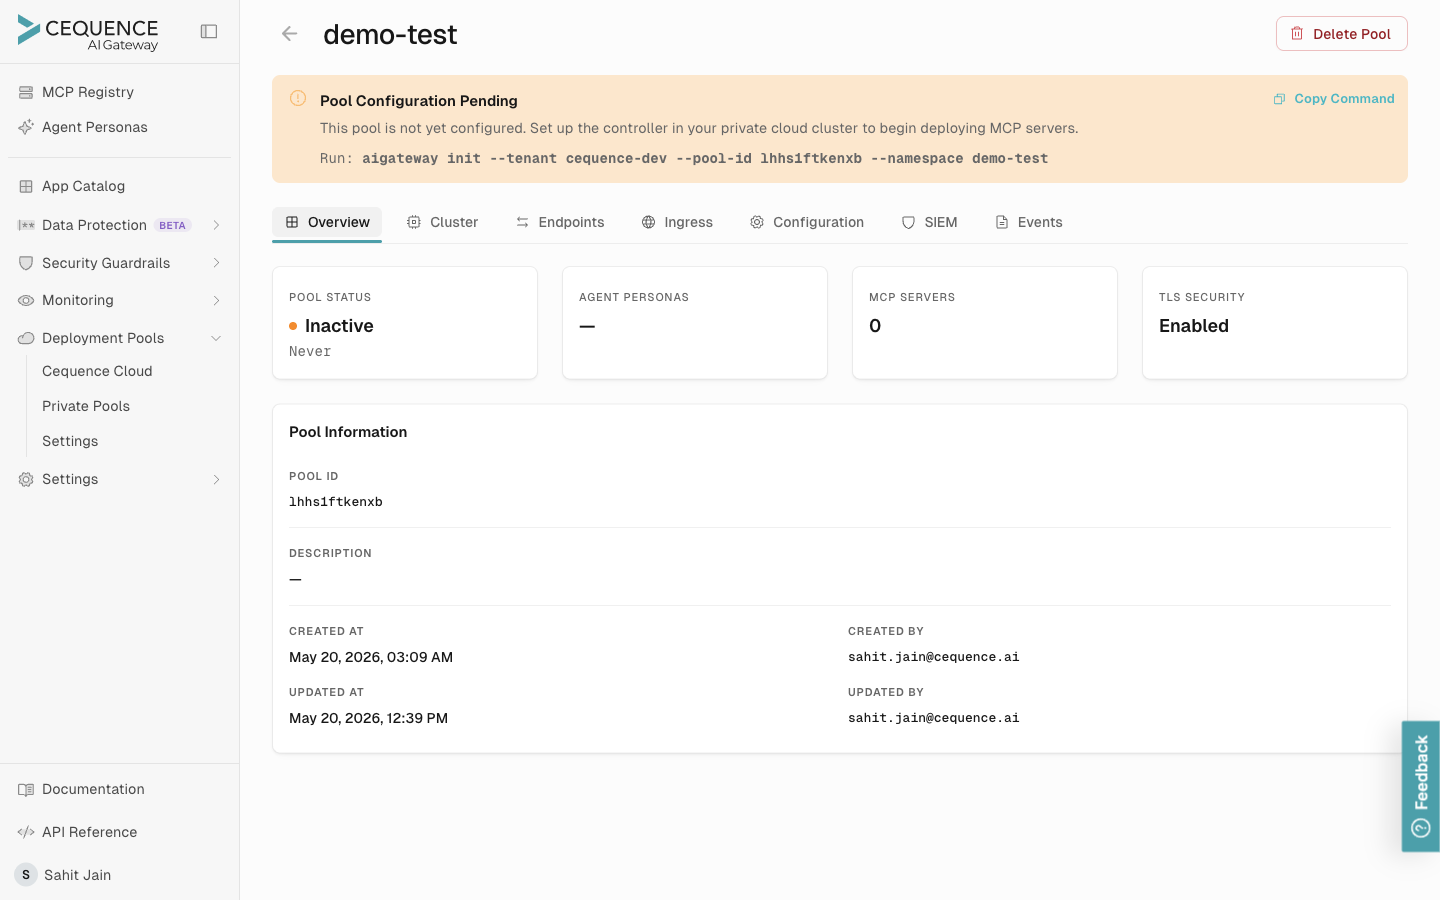
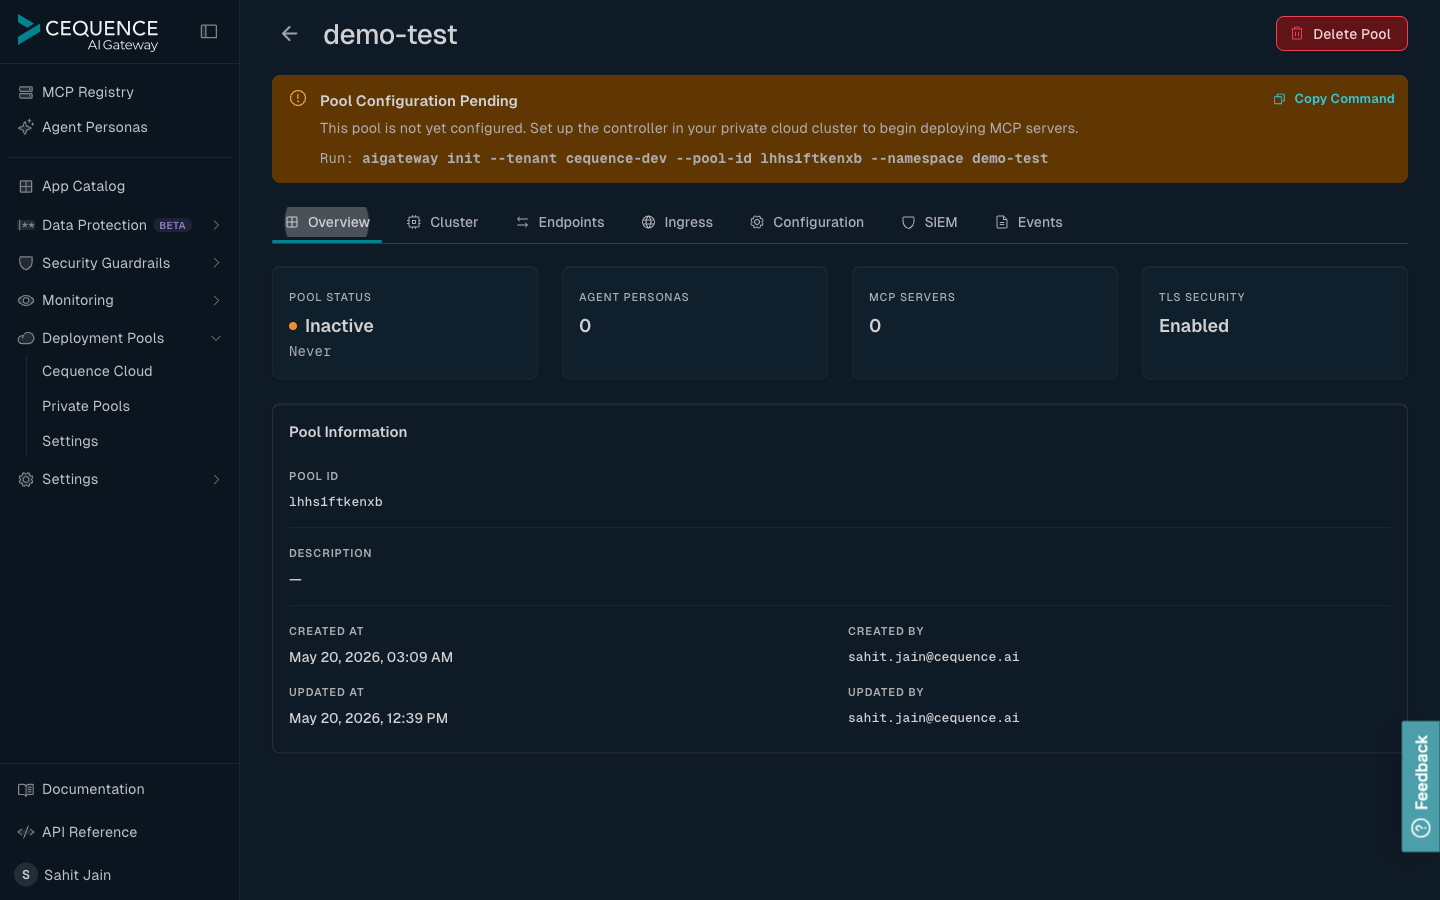
The banner disappears once the Operator connects and the pool transitions to Active.
Pool detail tabs
The pool detail page has the following tabs:
| Tab | What you configure here |
|---|---|
| Overview | Status, heartbeat, version, summary of deployed components |
| Cluster | Cluster-scoped settings (namespace, service account, cluster type) |
| Endpoints | The MCP endpoint hostnames Armor exposes |
| Ingress | Ingress provider(s) — see below |
| Configuration | Pool-level resource limits, image overrides, Redis mode |
| SIEM | SIEM exporter integration |
| Events | Recent operator events and pool activity |
Ingress tab
The Ingress tab is where you configure how MCP servers are exposed externally. Pools support multiple ingress providers, and you can enable more than one per pool.
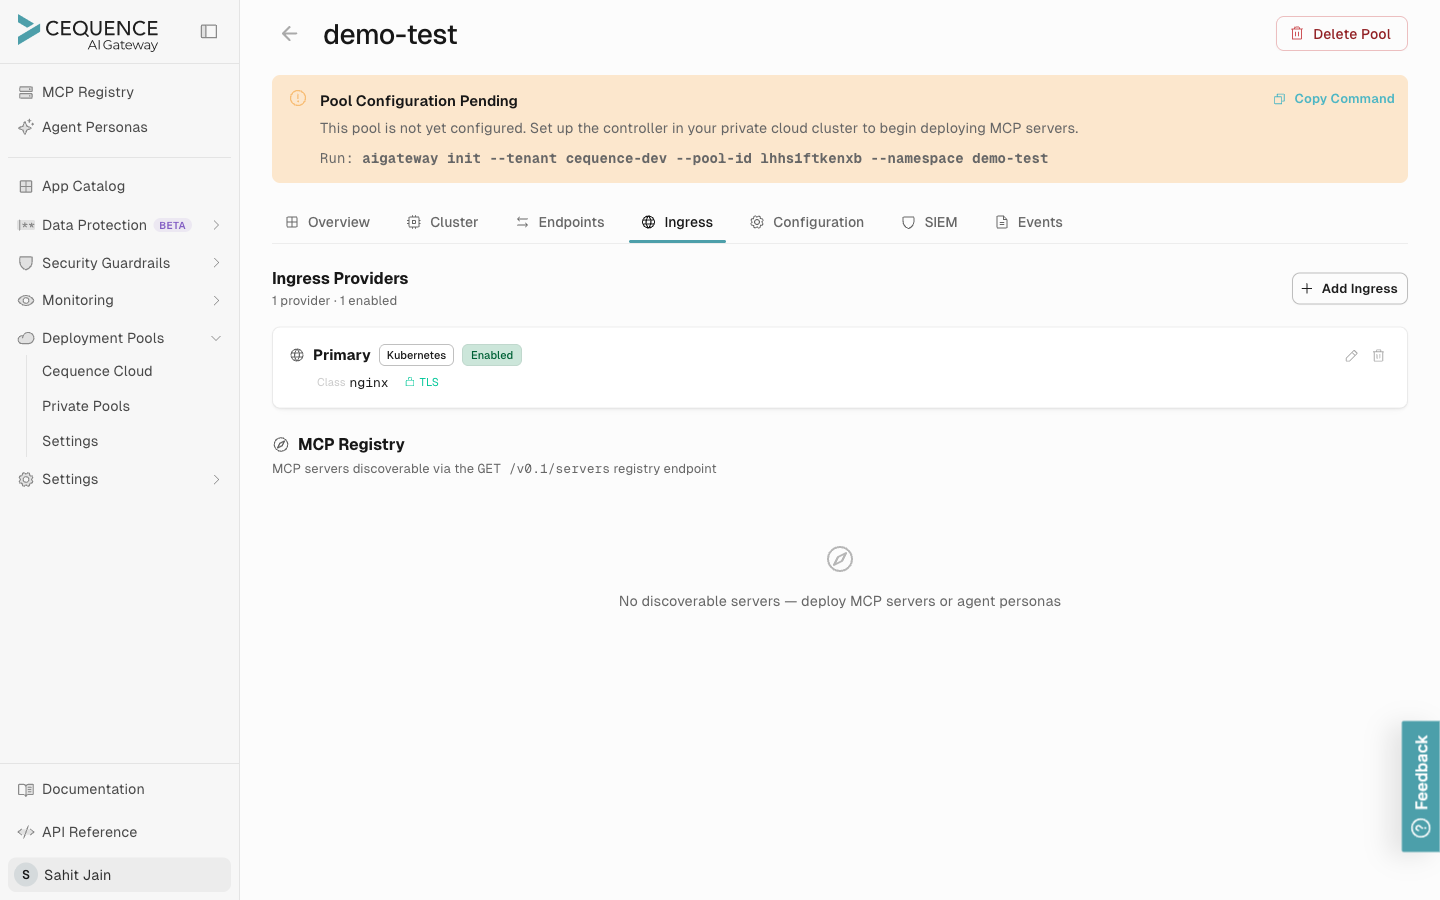
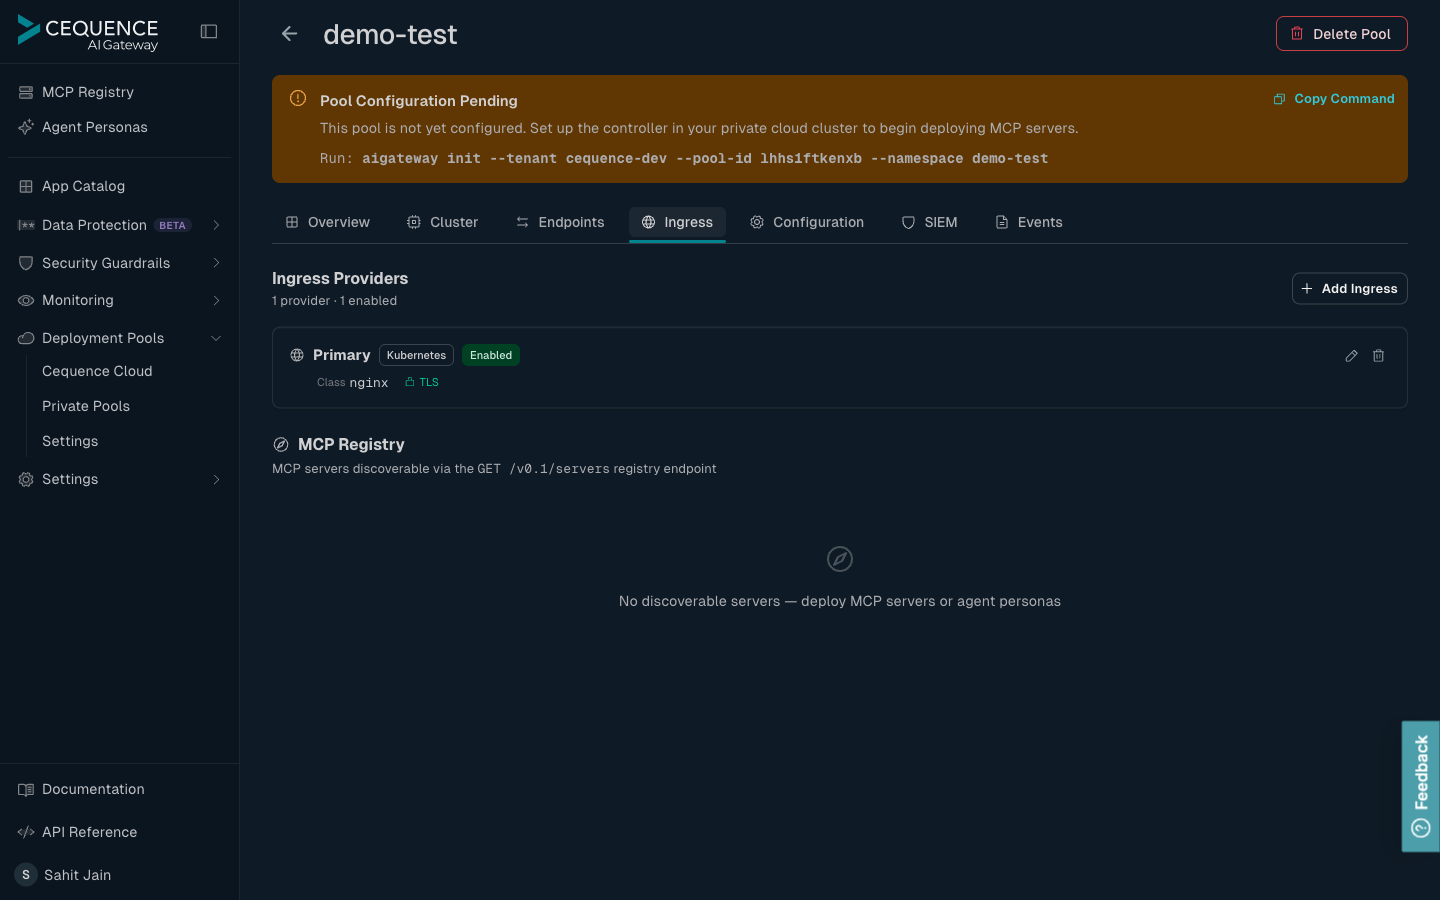
Each ingress provider entry shows its type (Kubernetes Ingress, Istio, Traefik, OpenShift route, Gateway API), its class or controller, and whether TLS is enabled. Use Add Ingress to register a new provider, and the per-row Edit / Delete actions to manage existing ones.
Supported ingress provider types include:
- Kubernetes Ingress — works with any standards-compliant controller (NGINX, AWS ALB, Azure Application Gateway, GKE Ingress, HAProxy, Kong, Contour, Ambassador, etc.). Configure host, ingress class name, TLS, and provider-specific annotations.
- Istio Gateway — for clusters running the Istio service mesh; configures Gateway + VirtualService resources.
- Traefik IngressRoute — for clusters using Traefik directly.
- Kubernetes Gateway API — for clusters using the upstream Gateway API (
HTTPRoute). - OpenShift Route — for OpenShift clusters.
The Operator's runtime Role grants permissions for all of these unconditionally so you can switch providers from this tab without re-rolling RBAC — see Operator runtime Role.
Tips
- Use descriptive names for pools (include environment and region)
- Set appropriate resource limits based on expected workload
- Enable TLS for production deployments
- For production, use an enterprise/managed Redis (ElastiCache, Memorystore, Azure Cache, Redis Enterprise) in Manual mode — the bundled Auto-install Redis is HA-capable (3-node Sentinel) but is intended for dev, POV, and self-contained installs.
- Use cell-based isolation to keep new or experimental servers off your production tier — enable Standard + Experimental and move a server to Experimental while you evaluate it, then promote it once it's proven.
- Configure ingress annotations for production (cert-manager, SSL redirect, etc.)
Cequence AI Gateway